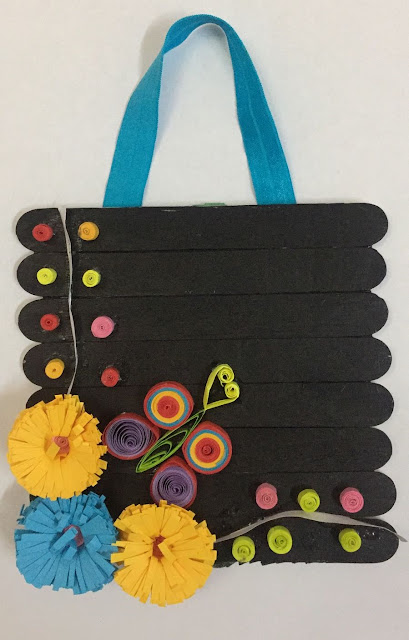
My quilling frame with ice-cream sticks
Hello
friends! Today I am going to tell you how I made this quilling frame as shown
above.
So first let
me tell you that there is a lot of nature in this frame. That’s why you can
also add more of nature in this frame using the basic shapes.
So here I
have stuck ice- cream sticks together and painted them black for the base. Now
I think we should start off with the butterfly, for the body I have used a five or seven leveled
quilling tool which you will find in a quilling set. Then for the head I have
folded one quilling strip in half and quilled it from left and right side and I
left little bit space in them and folded it back, for the bottom wings I stuck
two different colored quilling strips together and quilled it and made it pointed
and I got one basic shape, for the upper wings in the same way I stuck four
different quilling strips together and quilled it and after that I just pressed
the top part a bit to make another basic shape. Next let’s move on to the flowers so for the flowers I
took a big fat construction strip from a construction sheet and then I started making
some small cuts at the same level then with the fat construction strip with
small cuts I stuck one of the quilling strip and quilled it. Now for the rest
of the design I cut the quilling paper in half and I took one half and stuck it
standing and beside that I stuck some quilled circles. Now it’s your wish which
way you want to stick it, I did it two times and I stuck one beside the three
flowers and one on top of the flowers.
Then the final step; stick the ribbon on
top to hang it and then you may also like to stick any small size photo. there you
have a quilling frame ready!!! Gift it to your friends and family and enjoy the joy of sharing.
Hope you
like my quilling art!!! Thank you!!


Comments
Post a Comment